
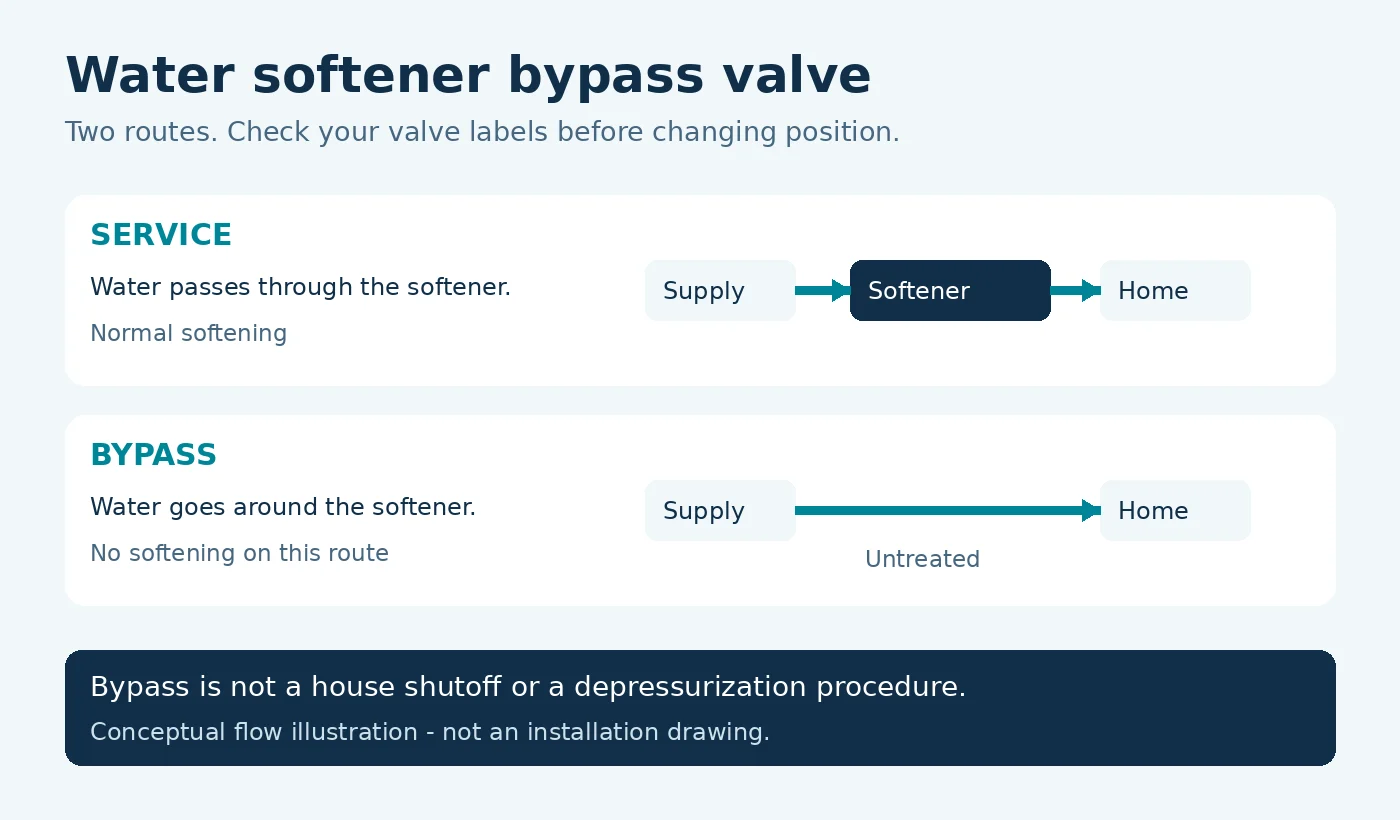
A water softener bypass valve sends water around the softener instead of through it. For normal softening, use the service position. To bypass the unit, follow the markings for your assembly: push-pull handles, rotary controls, and three-valve plumbing arrangements work differently. Water can still reach your home in bypass, but this softener is no longer treating it. [1]
Start by identifying the hardware rather than guessing whether “on” or “off” means soft water. This guide helps you read the positions and check the result without taking the valve apart.
Should the water softener bypass valve be on or off?
For everyday soft water, bypass mode should be off and the softener should be in service. That does not mean every handle should be closed. In the three-valve arrangement described by GE, service requires the inlet and outlet valves to be open while the connecting bypass valve is closed. [2]
| Arrangement | Service: softening | Bypass: no softening |
|---|---|---|
| Whirlpool push-pull assembly covered by its support guide | Handle pulled out | Handle pushed in |
| GE single bypass covered by its bypass guide | Pull out for service | Push in for bypass |
| Three-valve layout described by GE | Inlet open; outlet open; connecting bypass closed | Inlet closed; outlet closed; connecting bypass open |
| Clack WS1 / WS1.25 with the documented two-handle bypass | Both handles follow the engraved flow arrows | Both handles point inward toward the center; see the additional modes below. [8] |
| Other rotary levers or paired knobs | Match the assembly’s labeled service position | Match its labeled bypass position; appearance alone is not enough |
The first three rows follow Whirlpool and GE documentation. Culligan also describes rotary arrangements, but their appearance is not a universal guide to handle direction. Match your exact assembly to its instructions. [1] [2] [3]
Clack paired handles: bypass is not diagnostic or shutoff
The optional bypass shown in Clack’s WS1 / WS1.25 service manual has four modes. In diagnostic mode, the inlet follows the flow arrow and the outlet points inward: the control remains pressurized while untreated water reaches the house. With those two directions reversed, the manual identifies shutoff, not bypass. See printed pp. 32–33. [8]
Use this distinction to identify an installation, not to experiment with the two extra modes. If the handles have been removed, their orientation needs checking: Clack warns that they can be reinstalled 180 degrees out. Do not rely on handle color or a photograph of another assembly to establish isolation. [8]
Find and identify your bypass
Look where the supply and outlet pipes meet the softener, often behind the control head. You may find one sliding handle, a lever, paired knobs, or three separate plumbing valves. Look for service/bypass labels and flow arrows. Culligan’s guide explains these identification clues. [3]
Before moving anything, take a clear photo showing the labels and connected pipes. Record the softener model and, if different, the control-valve model. Find the corresponding diagram in the manual. A photo of an unfamiliar installation is useful to the installer; an assumed left/right orientation is not.
If you cannot trace which pipe enters the softener and which returns to the house, ask the installer to identify them. Include that information in your water softener maintenance record.
Water softener bypass valve diagram: three-valve layout
This original schematic shows the final flow paths for the three-valve arrangement documented by GE. It does not show handle angles, installation dimensions, or the sequence for operating your particular valves. [2]
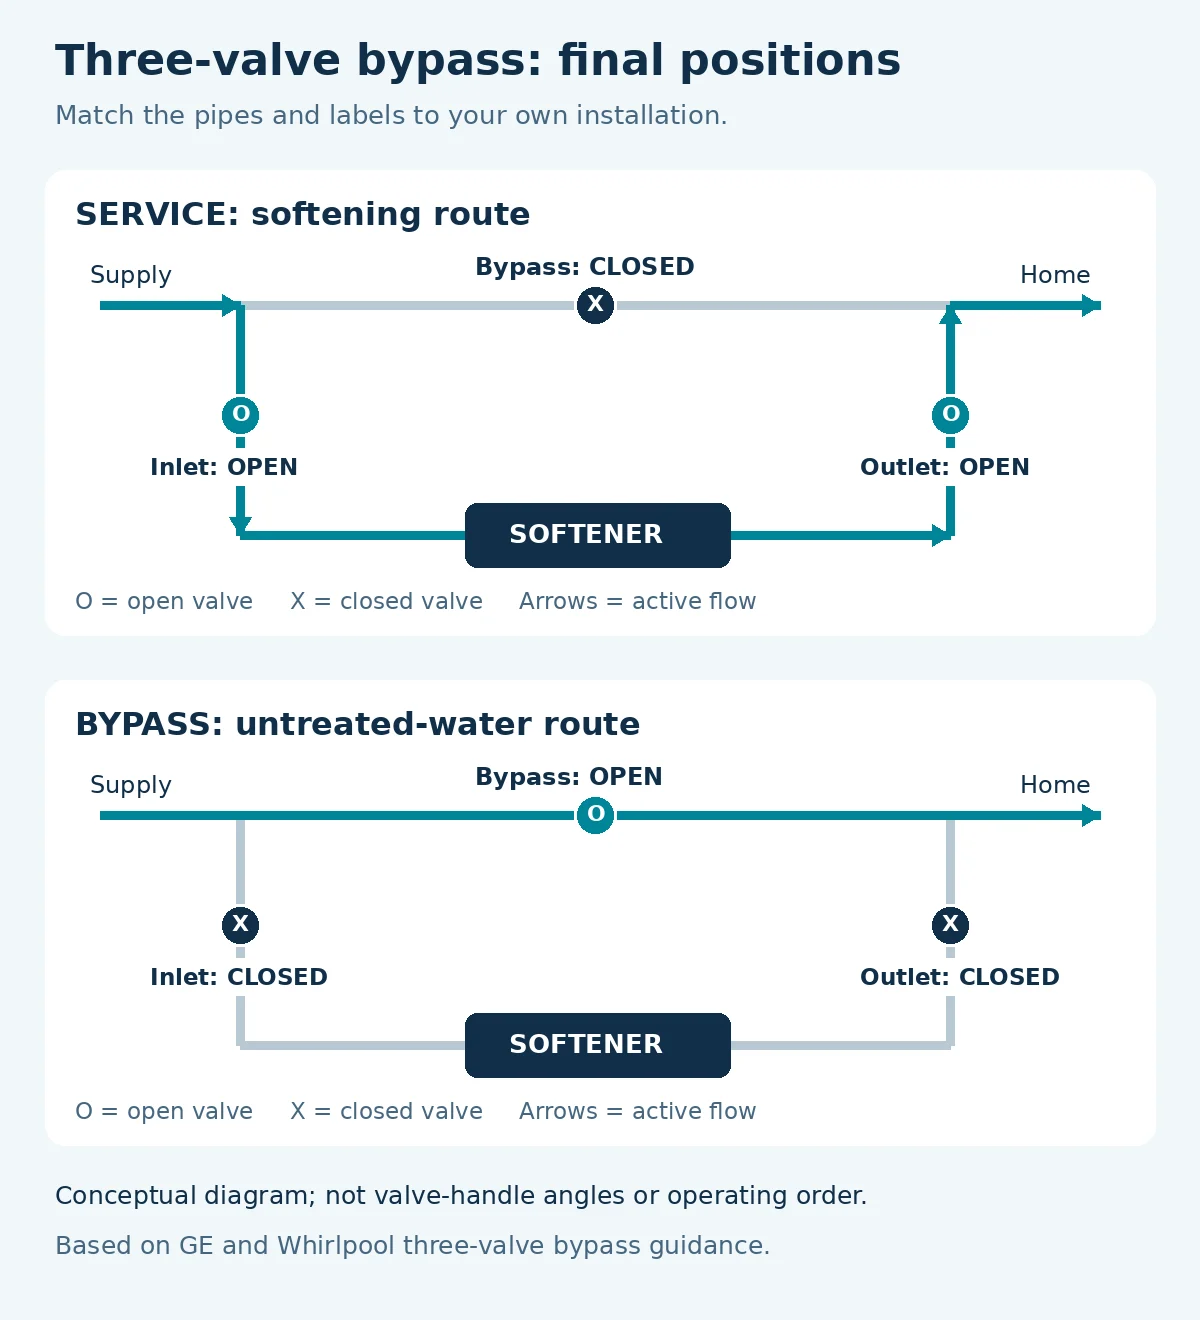
Use the table above as the text equivalent of the diagram. Do not treat an intermediate valve position as a normal operating setting unless your manufacturer explicitly provides for it.
How to bypass a water softener
1. Establish why you are bypassing it
Typical reasons include maintenance, a service visit, or outdoor water use where the faucet receives softened water. Pentair’s whole-house softener manual also identifies emergency equipment leaks as a reason to bypass. Many outdoor faucets already have an untreated supply, so check the plumbing before changing anything. [4]
For planned brine-tank cleaning, read the complete cleaning procedure first. Bypass is only one part of preparing the equipment.
2. Use the procedure for your valve
For the Whirlpool single push-pull assemblies covered by its support guide, push the handle inward to bypass. Do not apply that motion to a rotary valve. For a three-valve setup, the target state is an open connecting bypass with closed softener inlet and outlet valves; follow your manual for the operating sequence. [1]
Move only the intended control. If a handle will not move normally, stop rather than forcing it with tools; Culligan recommends service for a stuck bypass. [3]
3. Check the position and look for leaks
Compare the final position with the diagram for your model. Check visible connections and note whether the original symptom changes. Write down when you placed the equipment in bypass and why, so it is not accidentally left there after the work is finished.
Bypass does not prove that the softener is depressurized. Whirlpool’s disconnection instructions require a separate depressurization process before removing retaining clips. Do not undo connections, remove clips, or open the valve body just because the handle is in bypass. [5]
If you are using bypass to investigate weak flow, follow our guide to comparing water flow in service and bypass under similar household demand.
Read the result without overdiagnosing
| What you establish | What it does not establish | Useful record |
|---|---|---|
| The handles match the assembly’s bypass diagram | That trapped pressure has been released or fittings can be removed | Model, diagram reference and photo; leave pressure relief to the prescribed procedure |
| A symptom changes between service and bypass | Which internal component caused it | The same faucet, similar demand, each valve position and the observed difference |
| After return to service, a hardness test changes | That every faucet has the same supply route or that an opened system needs no recovery steps | Sample location, cold-water result, units and completed recovery sequence |
This is an observation framework, not a replacement for the model’s isolation or startup instructions. If the assembly is unidentified or a control is stuck, stop at identification rather than testing positions.
How to return the softener to service
Resolve the reason for bypass first. Then use the manufacturer’s return-to-service or startup procedure. The Whirlpool installation manual, for example, specifies bringing water into the softener gradually and checking for leaks; the required steps depend on whether the system has been drained or opened. [6]
Confirm the service position, check accessible connections, and follow any prescribed flushing or recharge instructions. Then test hardness at a known treated-water outlet. Record the sampling point and units. A handle in service establishes the intended route; a hardness test checks the treatment result.
If water remains hard and the salt level is not falling, continue with the water-softener-not-using-salt checks. Do not assume a bypass problem explains every performance issue.
What if the bypass valve is stuck or leaking?
Do not force a stuck control or start dismantling a leaking assembly. For active leaking or flooding, GE directs owners to shut off the water supply to the softener and contact the installer or plumber. A leak at the supply-side pipework may still need an upstream shutoff; do not assume that selecting bypass has stopped it. [7]
Give the service provider your model number, a photo, the exact leak location, and the valve position. Keep electrical equipment out of contact with water and do not reach into a wet area to handle a plug.
Bypass before a trip or winter shutdown
Bypass is one operation within a larger preparation plan. For an absence in a heated home, follow the water softener vacation checklist. For a location that could freeze, follow the winterization guide and your manufacturer’s drainage instructions. A bypass position alone does not confirm that water has been removed from the equipment.
Leaving the system in bypass
Keep a dated reminder to restore service after the fault or planned work is resolved. While bypassed, this unit does not soften the household supply. Return-to-service and pressure relief remain separate procedures.
Sources and model-specific instructions
Documentation for the additions below checked October 17, 2026. Use the manual supplied with your exact model if its instructions differ from these examples.
- Whirlpool: How Does a Bypass Valve Work?
- GE Appliances: Water Softener Bypass Options
- Culligan: Water softener bypass, what it is and how it works
- Pentair: Whole House Water Softening System manual (PDF), bypass and outside-faucet guidance.
- Whirlpool: Disconnecting the softener from plumbing
- Whirlpool: Owner’s manual W11484759, Rev. A (PDF), bypass diagrams and leak-test procedure.
- GE Appliances: Steps to Stop a Water Softener from Leaking
- Clack WS1 & WS1.25 Drawings and Service Manual, printed pp. 32–33 and 40: bypass modes and handle orientation
Updated October 17, 2026: added the documented Clack paired-handle distinction and a framework separating routing, pressure and treatment observations. Comparisons are based on documentation, not hands-on tests.